Your Cart is Empty


Unleash your creativity in the kitchen with the art of cookie stamping. Whether you're a seasoned baker or a beginner looking for a fun and straightforward baking project, cookie stamping is a delightful way to create impressive, uniquely decorated cookies.
From choosing the right cookie stamp to selecting the best dough, and from mastering the stamping technique to perfecting the baking process, this guide will walk you through everything you need to know to make stunning stamped cookies. Beloved by bakers for decades, cookie stamps are small engraved plates designed to imprint intricate patterns on cookie dough. These stamps come in a wide array of materials, including metal, acrylic, wood, and silicone, and feature diverse designs, from geometric patterns and snowflakes to dinosaurs and pumpkins. Using a cookie stamp is not only simple but also a fun way to involve all family members, including kids, in the baking process. Now, let's dive into the world of cookie stamping and discover the secrets to create perfect stamped cookies. Cookie stamps come in different materials, each offering specific benefits and considerations. Silicone stamps, for example, are generally easier to clean and dishwasher safe. On the other hand, metal stamps, particularly those made of cast aluminum, enable highly detailed impressions on the dough. Though impressive in detail, metal and wood cookie stamps require careful handling and maintenance. Unlike silicone stamps, they are not typically dishwasher safe and should be hand washed instead. However, the extra effort is often worth it for the stunning, intricate designs they can imprint on your cookies. When it comes to creating perfect stamped cookies, the choice of dough is crucial. Baking experts recommend avoiding doughs with leavening agents such as baking powder and baking soda, as they can distort the stamped design during baking. Instead, opt for a shortbread recipe with an added egg to provide structure to the dough. Some bakers also find success with gingerbread cookie dough, particularly the sturdy type used for constructing gingerbread houses. The key to a clear, detailed impression lies in the right dough consistency and the correct use of the cookie stamp. Chilling the dough before stamping is an excellent way to prevent it from sticking to the stamp. This technique, known as the double-chill method, involves chilling the dough, stamping it, and then chilling it again to maintain the shape while baking. To ensure your stamp leaves a vivid impression, using a natural aluminum cookie sheet can be beneficial. The surface will hold the cookie just enough for easy removal from the stamp. Also, try using a rocking motion when lifting the stamp from the dough to preserve the design. There are two primary methods for using a cookie stamp. The first involves portioning the dough into balls and applying the stamp to each with even pressure. Starting with walnut-sized dough balls, approximately 1-1 ½ inches in size, is a good idea. The second method is the roll and cut technique, where you roll out your dough to a uniform thickness and apply the stamp in rows. This method can result in cookies with consistent thickness, and it allows for better control over the design placement. Regardless of the method, remember to lightly dust the stamp's surface with flour between each cookie to ensure a perfect impression in the dough. While the stamped design can be decoration enough, adding a bit of extra flair is entirely up to your creativity and preference. One popular option is to roll the cookie dough in granulated sugar, powdered sugar, or cocoa powder before stamping. This step adds a delightful crunch and color to the cookies, enhancing their visual appeal without overshadowing the stamped design. Whether your cookie cutter and stamp are 3D printed or made of metal, proper care is necessary to ensure they last for many baking sessions. Remember to wash your tools with warm water and a small brush, and store them in a plastic bag away from metal cutters. Ensure that your cookie cutter and stamp are not exposed to high temperatures, and avoid cleaning them with metal objects to prevent scratching. A good cookie stamping recipe balances flavor and texture, ensuring delicious cookies that hold their shape and design well. The following is an example of such a recipe, adapted from a classic sugar cookie recipe. This recipe yields about 24 cookies. After stamping and trimming the cookies, it's time to bake them. Chill the stamped cookies for at least 15 minutes before baking to help preserve the design. Then, bake them at your preferred temperature until they are just starting to turn slightly golden on the edges. Remember, the cookies will continue to bake a bit and will brown up a little more once removed from the oven. Once baked, remove the cookies from the tray and cool them on a wire rack. When the cookies are completely cooled, they can be stored in an airtight container for about a week. Now, all that's left to do is enjoy your beautifully stamped cookies! Cookie stamping is a fun, creative, and simple way to bake impressive cookies. With the right tools, the best dough, and a bit of practice, you'll be turning out stunning stamped cookies in no time. So, why wait? Start exploring the delightful world of cookie stamping today!A Brief Introduction to Cookie Stamps
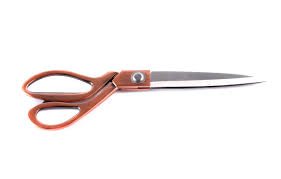
Choosing the Ideal Cookie Stamp
Selecting the Perfect Dough
The Art of Making an Impression
The Two Methods to Use a Cookie Stamp
To Decorate or Not to Decorate
The Cookie Cutter and Stamp Care
The Cookie Stamping Recipe
Ingredients:
Instructions:
The Final Touch: Baking the Stamped Cookies
Post-Baking Care
References: