Your Cart is Empty


Introduction
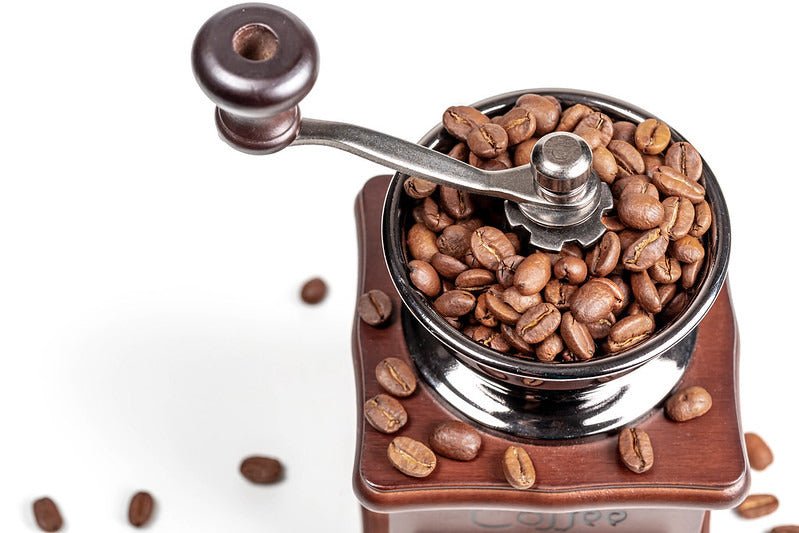
Are you tired of your coffee tasting off or stale? It might be time to give your coffee grinder a thorough cleaning. Over time, coffee grinders can accumulate oils and old coffee grounds, which can negatively impact the flavor of your freshly brewed coffee. In this comprehensive guide, we will walk you through the step-by-step process of cleaning and maintaining your coffee grinder to ensure optimal performance and a delicious cup of coffee every time. Coffee grinders, whether manual or electric, can easily collect oils and coffee particles as you grind your beans. These deposits can become stale and rancid, affecting the taste of your coffee. Additionally, old coffee grounds can mix with fresh grounds, resulting in an unpleasant flavor profile. Regular cleaning ensures that your grinder is free from these contaminants, allowing you to enjoy the full flavor potential of your coffee beans. Before we dive into the cleaning process, it's important to understand the different types of coffee grinders and their unique cleaning requirements. There are two main types of coffee grinders: manual and electric. Manual coffee grinders, also known as hand grinders, are compact and portable. They typically consist of a hopper, a grinding chamber with burrs, and a handle for manual grinding. Cleaning a manual grinder is relatively simple compared to electric grinders. Electric coffee grinders, on the other hand, are powered by electricity and often come with more intricate designs and additional features. These grinders can have various parts, including a hopper, burrs or blades, a grind chamber, and a collection container. Cleaning an electric grinder requires a bit more effort and attention to detail. To keep your coffee grinder in top shape, it's essential to incorporate daily maintenance into your routine. This quick and easy process will help prevent the buildup of old coffee grounds and oils. Here are the steps for daily maintenance: Remove Grounds and Wipe Down: After each use, empty the grounds from the grinder and use a soft brush or a dry cloth to wipe down the exterior surfaces, including the hopper, grind chamber, and collection container. Clean the Catch Cup: If your grinder has a catch cup, give it a quick rinse with warm soapy water to remove any oils or residue. Make sure to dry it thoroughly before reattaching it to the grinder. Clear the Chute: Check the chute where the ground coffee is guided into the collection container. Use a narrow brush or a cotton swab to remove any trapped coffee particles. This step is especially important for dark roasted coffee, as the oils can easily accumulate and affect the flavor of future brews. Inspect the Burrs: Take a moment to inspect the burrs for any visible buildup of coffee grounds or oils. If necessary, gently brush the burrs using a soft brush or a toothpick to dislodge any stubborn residue. Be careful not to damage the burrs during this process. By incorporating these simple steps into your daily routine, you can maintain the cleanliness and performance of your coffee grinder on a regular basis. While daily maintenance is crucial for keeping your coffee grinder clean, a more thorough deep cleaning is necessary every few months to remove any stubborn residue and ensure optimal performance. Here's a step-by-step guide to deep cleaning your grinder: Disassemble the Grinder: Start by disassembling your coffee grinder according to the manufacturer's instructions. Remove the hopper, burrs, and any other removable parts. Lay them out on a clean towel or surface, making sure not to lose any small components. Clean the Removable Parts: Begin by rinsing the removable parts, such as the hopper and the burrs, with warm soapy water. Use a soft brush or a toothbrush to scrub away any coffee residue or oils. Make sure to rinse the parts thoroughly and dry them completely before reassembling. Remove Grounds and Oils: Use a dry cloth or a brush to remove any remaining coffee grounds or oils from the grinder's internal surfaces. Pay close attention to the nooks and crannies where residue tends to accumulate. Be gentle to avoid damaging any delicate parts. Inspect and Clean the Burrs: Examine the burrs closely for any signs of buildup or damage. If necessary, use a toothpick or a small brush to remove any trapped grounds or oils. Avoid using water on the burrs, as it can cause rusting in some cases. Instead, focus on dry cleaning methods. Reassemble the Grinder: Once all the parts are clean and dry, carefully reassemble the grinder, following the manufacturer's instructions. Ensure that each component is properly aligned and securely fastened. To maintain the cleanliness and performance of your coffee grinder, consider the following tips and recommendations: Frequency of Deep Cleaning: The frequency of deep cleaning your coffee grinder depends on various factors, including usage, coffee bean type, and grinder model. As a general guideline, aim to deep clean your grinder every 2-3 months, or more frequently if you notice a decline in performance or flavor quality. Choosing Cleaning Products: While warm soapy water is generally sufficient for cleaning most parts of your grinder, some manufacturers produce specialized grinder cleaning tablets. These tablets are designed to break down oils and remove stubborn residue. However, they are not always necessary and can be more expensive than alternative cleaning methods. Avoid Rice for Cleaning: While some sources suggest using rice to clean coffee grinders, it is generally not recommended. Rice can be too hard and may damage the grinder's motor or burrs. Additionally, it can leave starchy residue, making the cleaning process more challenging. Proper Storage: After cleaning your coffee grinder, ensure that it is completely dry before storing it. Moisture can lead to mold or rust formation, compromising the grinder's performance and longevity. Store your grinder in a clean and dry place, away from direct sunlight and excessive humidity. Regular Burr Replacement: Over time, burrs can wear down and become less effective at grinding coffee beans. It's recommended to replace the burrs periodically, according to the manufacturer's guidelines. This will ensure consistent grind quality and prevent any potential issues with your grinder. Cleaning and maintaining your coffee grinder is an essential step towards enjoying the best-tasting coffee possible. By incorporating daily maintenance and regular deep cleaning into your routine, you can ensure that your grinder performs optimally and delivers delicious coffee every time. Remember to follow the manufacturer's instructions, use appropriate cleaning methods, and store your grinder properly to prolong its lifespan. With a clean coffee grinder, you can savor the full flavor potential of your favorite beans and elevate your coffee brewing experience.Why Clean Your Coffee Grinder?
Understanding Different Types of Coffee Grinders
Manual Coffee Grinder
Electric Coffee Grinder
Daily Maintenance for Your Coffee Grinder
Deep Cleaning Your Coffee Grinder
Additional Tips and Considerations
Conclusion
References