FREE Worldwide Shipping! | +1 365 654 6605

0

Your Cart is Empty

How to Sharpen an Apple Slicer: A Comprehensive Guide

How to Sharpen an Apple Slicer: A Comprehensive Guide - Maria's Condo

Introduction

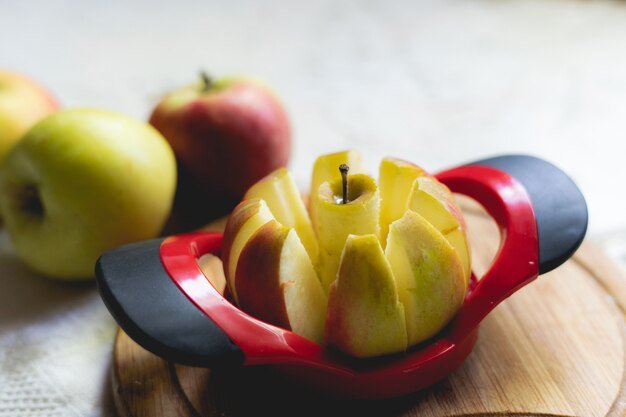
Apple slicers are a convenient kitchen tool that allows you to quickly and easily slice apples into perfect wedges while removing the core. However, over time, the blades of your apple slicer may become dull, affecting its performance. In this comprehensive guide, we will explore the benefits of sharpening your apple slicer and provide step-by-step instructions on how to do it effectively. Whether you have a Pampered Chef apple slicer or any other brand, these techniques will apply universally.

Why Sharpen Your Apple Slicer?

Apple slicers are designed with sharp blades to effortlessly cut through apples, providing ease and efficiency in the kitchen. However, with regular use, the blades can become dull, resulting in a less than satisfactory slicing experience. By sharpening your apple slicer, you can:

  1. Improve Efficiency: A sharp apple slicer will glide through apples effortlessly, saving you time and effort in the kitchen.
  2. Enhance Safety: Dull blades can lead to slips and accidents while slicing. Sharpening your apple slicer ensures a safer slicing experience.
  3. Maintain Precision: Sharp blades produce clean, even slices, allowing you to create visually appealing fruit platters or use sliced apples in recipes.
  4. Prolong Slicer Lifespan: Regular sharpening helps extend the lifespan of your apple slicer, saving you money on frequent replacements.

Step 1: Gather the Necessary Materials

Before you begin sharpening your apple slicer, gather the following materials:

  1. Sharpening Stone or Honing Rod: A fine-grit sharpening stone or honing rod is essential for sharpening the blades of your apple slicer. You can find these at most kitchen supply stores or online retailers.
  2. Damp Cloth: A damp cloth will be used to clean the blades before and after sharpening.
  3. Kitchen Towel: A kitchen towel will come in handy for wiping away any debris or excess moisture during the sharpening process.

Step 2: Prepare the Apple Slicer for Sharpening

Before sharpening the blades, it's important to prepare the apple slicer:

  1. Clean the Slicer: Use a damp cloth to wipe away any dirt, debris, or residue from the blades. This ensures a clean surface for sharpening.
  2. Secure the Slicer: Place the apple slicer on a flat, stable surface to prevent any movement or accidents during sharpening.

Step 3: Sharpen the Blades

Now that your apple slicer is prepared, it's time to sharpen the blades:

  1. Determine the Blade Angle: Look closely at the blades of your apple slicer to identify the angle. Most apple slicers have a slight bevel on the blades.
  2. Position the Sharpening Stone: Hold the sharpening stone firmly in one hand and position it against the beveled edge of the blade at the same angle.
  3. Apply Light Pressure: Apply light pressure and slide the stone along the blade in a sweeping motion. Maintain a consistent angle and repeat this process several times for each blade.
  4. Alternate Sides: To ensure even sharpening, alternate between sharpening the front and back sides of the blades. This helps maintain balance and symmetry.

Step 4: Test and Fine-Tune the Blades

After sharpening the blades, it's essential to test their sharpness and make any necessary adjustments:

  1. Carefully run your finger along the edge of the blade to assess its sharpness. Be cautious and avoid applying too much pressure to prevent injuries.
  2. If the blades are still not sharp enough, repeat the sharpening process, focusing on areas that may need more attention.
  3. Once you are satisfied with the sharpness, use a clean kitchen towel to wipe away any debris or moisture from the blades.

Additional Tips and Maintenance

To keep your apple slicer in optimal condition, consider the following tips:

  1. Regular Cleaning: After each use, clean the apple slicer thoroughly to remove any food particles. This prevents the buildup of residue that can affect the sharpness of the blades.
  2. Proper Storage: Store your apple slicer in a dry and clean location to avoid unnecessary exposure to moisture or humidity, which can cause corrosion.
  3. Avoid Dishwashers: Hand-wash your apple slicer rather than placing it in the dishwasher. The harsh detergents and high heat can damage the blades and handle.
  4. Protective Cover: Consider using a protective cover or storing the apple slicer in a cutlery drawer tray to prevent the blades from coming into contact with other utensils.

Frequently Asked Questions

What is the difference between suction and clamp apple peeler?

Suction and clamp apple peelers refer to the mechanism used to secure the peeler during use. Suction peelers have a suction cup base that adheres to a smooth surface, such as a countertop. Clamp peelers, on the other hand, have a clamp or vice-like attachment that can be secured to a table or countertop edge.

Can I use an apple peeler without slicing?

Yes, most apple peelers have a separate setting that allows you to peel the apple without slicing it. This is useful when you only want to remove the skin without cutting the fruit.

Is it better to peel apples or not to peel?

Whether to peel apples or not depends on personal preference and the recipe you are preparing. Apple peels contain fiber and nutrients, so leaving the peel intact can provide added nutritional value. However, some recipes may call for peeled apples for texture or presentation purposes.

Can we eat apples at night?

Apples can be consumed at any time of the day, including at night. However, it's important to consider portion sizes and individual dietary needs. If you have specific dietary restrictions or concerns, it's best to consult with a healthcare professional.

Conclusion

Sharpening your apple slicer is a simple and effective way to ensure optimal performance and prolong its lifespan. By following the step-by-step instructions provided in this guide, you can easily sharpen your apple slicer at home and enjoy the benefits of effortless slicing and coring. Remember to exercise caution during the sharpening process and maintain regular maintenance to keep your apple slicer in top shape. Happy slicing!

References:

Marias Condo
Marias Condo


Also in Kitchen

Why Do Kitchen Scissors Have a Hook? Unveiling the Secret! - Maria's Condo
Why Do Kitchen Scissors Have a Hook? Unveiling the Secret!

April 16, 2024 7 min read

The Best Kitchen Shears for Prepping Anything - Maria's Condo
The Best Kitchen Shears for Prepping Anything

April 16, 2024 6 min read

Kitchen Scissors: The Versatile and Essential Tool for Every Chef - Maria's Condo
Kitchen Scissors: The Versatile and Essential Tool for Every Chef

April 16, 2024 6 min read