Your Cart is Empty

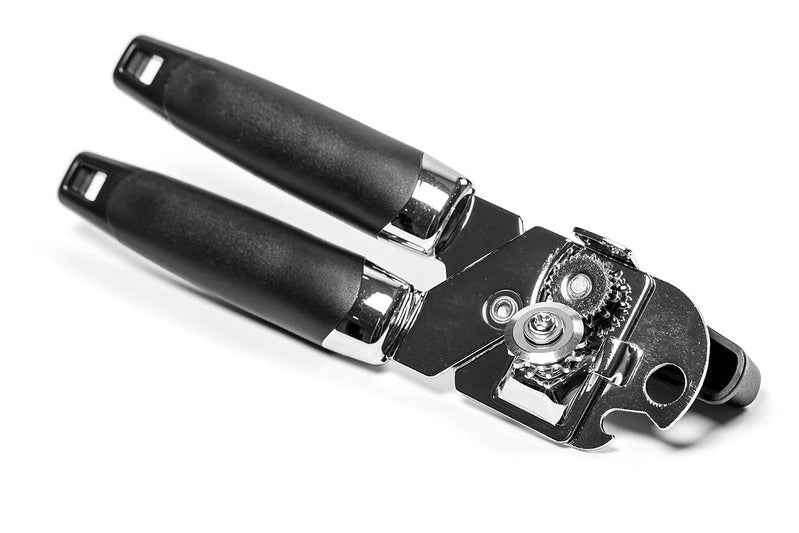

Can openers are an essential tool in every kitchen, making it easy to access the contents of canned foods. However, due to frequent use and exposure to food, can openers can become dirty and harbor bacteria if not properly cleaned and maintained. In this comprehensive guide, we will provide step-by-step instructions on how to clean and maintain both manual and electric can openers, ensuring their longevity and hygiene. Cleaning your can opener regularly is vital for maintaining a hygienic kitchen environment and preventing the spread of bacteria. Can openers, especially those used to open cans with liquid contents, can accumulate food residues, mold, yeast, and even harmful bacteria such as salmonella or E.coli. These contaminants can transfer to other cans or contaminate your food, potentially leading to foodborne illnesses. Therefore, it is important to incorporate proper cleaning and maintenance practices into your kitchen routine. Manual can openers are relatively simple to clean and maintain. The following steps will guide you through the process: Start by soaking the manual can opener in warm, soapy water for about 5 minutes. This will help loosen any stuck-on food or grime. You can use a bowl or sink for this purpose, ensuring that all parts of the can opener are submerged. After soaking, use a toothbrush or dish brush to scrub the cutting wheel and the sides of the blade. Pay special attention to the tight spaces where germs and food residues can accumulate. Scrub in a circular motion to dislodge any remaining grime and rust. Once cleaned, dry the manual can opener thoroughly with a clean dish towel or allow it to air dry completely. It is crucial to ensure that no moisture remains on the can opener, as this can lead to rust formation. Store the can opener in a dry place, away from sources of heat or moisture, to prevent damage and maintain its functionality. Electric can openers require a slightly different cleaning approach. Follow these steps to clean and maintain your electric can opener effectively: Before cleaning your electric can opener, ensure that it is unplugged to avoid any accidents. Use a soft, damp cloth to wipe down the exterior surfaces of the can opener, removing any surface dirt or grime. Pay attention to the areas around the cutting blade and the feed wheel. If your electric can opener has a removable blade bracket, follow the manufacturer's instructions to detach it. Wash the blade bracket in hot, soapy water, using a sponge or dishcloth to remove any food residues or rust. Rinse thoroughly and dry it completely before reattaching it to the can opener. If the cutting wheel is not removable, use a toothbrush dipped in baking soda to scrub the surface and remove any accumulated residue or rust. Wipe clean with a damp cloth or wet paper towel, and then dry it thoroughly with a clean, dry cloth. If your can opener has accumulated significant grime, rust, or residue over time, a deep-cleaning method can help restore its cleanliness and functionality. Follow these steps for a thorough deep clean: For deep cleaning, start by preparing a vinegar solution. Fill a bowl or jar with white vinegar or apple cider vinegar, ensuring there is enough liquid to fully submerge the can opener. Place the can opener in the solution and let it soak for a few hours, or overnight if the grime is particularly stubborn. The acidity of the vinegar helps dissolve rust and grime, making it easier to clean the can opener effectively. Ensure that all moving parts, such as the gears and blade, are fully submerged in the vinegar solution. After soaking, use a toothbrush or small cleaning brush to scrub the gears and other surfaces of the can opener. Pay close attention to areas with visible rust or grime, using circular motions to dislodge any buildup. Rinse the can opener thoroughly under warm water to remove any vinegar or loosened debris. Once cleaned, dry the can opener thoroughly with a clean dish towel or cloth. Pay special attention to the gears and moving parts, ensuring that all moisture is removed to prevent rust formation. If necessary, use compressed air or blow gently into the gears to ensure they are completely dry. To further protect against rust, you can apply a small amount of food-grade mineral oil to the gears. This lubricates the moving parts and helps prevent moisture from causing rust over time. Be sure to wipe off any excess oil to avoid greasy residue on your can opener. By performing a deep clean periodically, you can maintain the cleanliness and functionality of your can opener, ensuring it lasts for years to come. Regular maintenance is key to keeping your can opener in optimal condition. Here are some tips to ensure the longevity and performance of your can opener: To prevent the buildup of food residues and bacteria, it is important to clean your can opener after each use. By rinsing it thoroughly under running water and using a mild dishwashing detergent, you can remove any remaining food particles and maintain the can opener's cleanliness. When cleaning your can opener, it is important to use a good quality dishwashing detergent. Avoid harsh chemicals or abrasive cleaners that can damage the can opener's surfaces or compromise its functionality. Mild dish soap is generally sufficient for effective cleaning. After cleaning and drying your can opener, it is crucial to store it in a dry place. Moisture can promote rust formation, especially in the gears and other metal parts. Avoid storing your can opener near sources of heat or moisture, such as the stove or sink, as this can accelerate rusting. If your can opener has moving parts, such as gears or a trigger mechanism, periodic lubrication can help maintain smooth operation. Food-grade mineral oil is suitable for lubricating these parts. Apply a few drops of mineral oil to the gears and other moving components, ensuring even distribution. Wipe off any excess oil to prevent buildup. The cutting blade of your can opener is essential for smooth and safe operation. Regularly inspect the blade for signs of dullness or rust spots. If the blade is no longer sharp or shows signs of wear, consider replacing it with a new one. Dull blades can make it difficult to open cans, and they may compromise the cleanliness and safety of the process. By following these maintenance practices, you can ensure that your can opener remains in excellent condition, providing you with reliable performance and hygienic food preparation. While regular cleaning and maintenance can extend the life of your can opener, there may come a time when it needs to be replaced. Here are some signs that indicate it may be time for a new can opener: Inspect your can opener for signs of irreparable damage, such as broken or bent parts, loose screws, or malfunctioning gears. If the can opener is no longer operating smoothly or poses a safety risk, it is advisable to replace it. When selecting a new can opener, consider factors such as durability, ease of use, and hygiene. Stainless steel can openers are a popular choice due to their rust resistance and easy cleaning. Look for models with positive customer reviews and reliable performance. By replacing your old can opener when necessary, you can ensure safe and efficient food preparation in your kitchen. Different types of can openers require specific techniques for proper use. Here are some tips for using each type effectively: To use a manual can opener, place the can on a flat surface and spread the arms of the can opener. Line up the cutting wheel with the top of the lid and squeeze the arms together to puncture the can. Turn the knob to cut around the lid, ensuring the can opener remains perpendicular to the side of the can. Safely pry off the lid using a butter knife, taking care to avoid the sharp edge of the can. Smooth edge or safety can openers cut through the side of the can rather than the top. Place the can on a flat surface and line up the notched feed wheel at the lip of the lid. Line up the cutting wheel with the side of the can and turn the knob to cut around the lid. Use notch lid pliers to remove the top by hooking them beneath the lid and lifting it off. To use an electric can opener, plug it in and position the can against the opener. Raise the lever and line up the can with the opening, ensuring it lies flush against the back of the can opener. Lower the lever to clamp the can into place. Turn the power on, and the cutting blade will puncture the lid while the can opener automatically rotates the can. Lift the lever to release the can and remove the lid from the magnet. By following these tips, you can safely and efficiently use different types of can openers, ensuring a smooth and clean opening process. Cleaning and maintaining your can opener is a straightforward process. Follow these step-by-step instructions for both manual and electric can openers: By following these step-by-step instructions, you can effectively clean and maintain both handheld and electric can openers, ensuring their longevity and hygiene. In conclusion, cleaning and maintaining your can opener is essential for a hygienic and efficient kitchen. By following the step-by-step instructions provided in this comprehensive guide, you can effectively clean both manual and electric can openers, prevent rust and bacteria buildup, and ensure safe food preparation. Remember to regularly inspect your can opener for signs of wear and damage, and replace it when necessary to maintain optimal performance. With proper care, your can opener will continue to serve you well for years to come. Happy can opening!Introduction
1. Why Cleaning Your Can Opener is Important
2. How to Clean a Manual Can Opener
Soaking the Can Opener
Scrubbing the Gears
Drying and Storing the Can Opener
3. How to Clean an Electric Can Opener
Unplugging and Wiping Down the Can Opener
Removing and Cleaning the Blade Bracket
4. Deep-Cleaning Your Can Opener
Soaking in Vinegar Solution
Scrubbing and Rinsing the Gears
Drying and Preventing Rust
5. Proper Maintenance of Your Can Opener
Regular Cleaning After Each Use
Using a Good Quality Dishwashing Detergent
Storing in a Dry Place
Lubricating Moving Parts
Checking and Replacing Dull Blades
6. When to Replace Your Can Opener
Signs of Irreparable Damage
Choosing a New and Reliable Model
7. Tips for Using Different Types of Can Openers
Manual Can Openers: Proper Technique and Safety
Smooth Edge or Safety Can Openers: Cutting from the Side
Electric Can Openers: Positioning and Clamping
8. How to Clean and Maintain a Can Opener - Step-by-Step
Washing and Air Drying a Handheld Can Opener
Removing Rust and Gunk from a Handheld Can Opener
Cleaning and Drying an Electric Can Opener
Conclusion
References